Sending E-mails to Multiple Recipients
Sending E-mails to Multiple Recipients
Bizagi allows you to send emails to multiple addresses. This can be done in four ways:
- Typing each of the required addresses.
- Selecting the attributes in the data model that contain email addresses.
- Including a collection which contains several email addresses.
- A combination of the above three options.
Below you will find further information about the possible ways to configure multiple recipients.
Typing Multiple Addresses
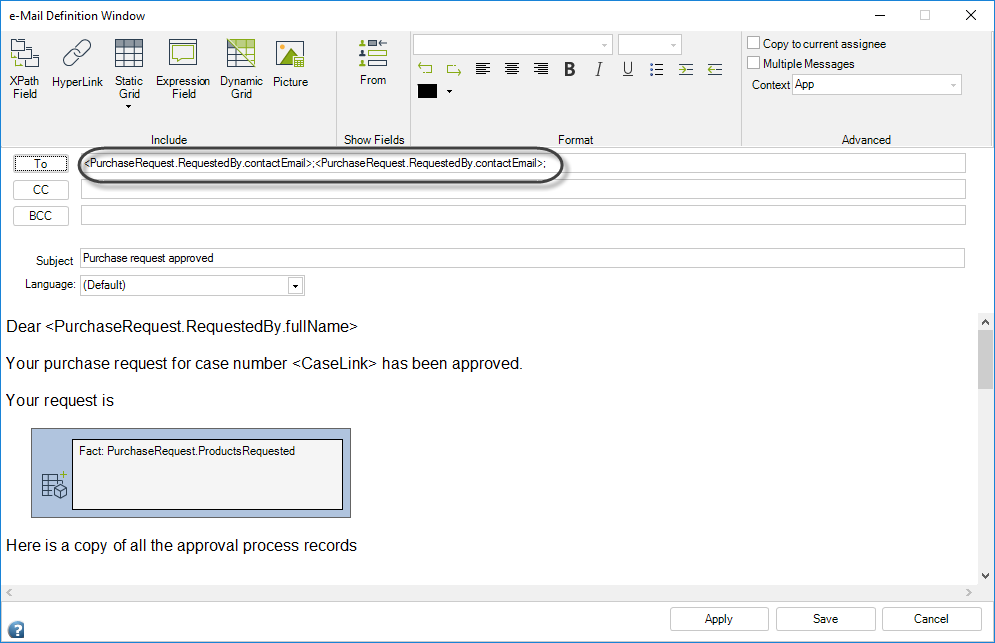
In some cases, emails are not dependent on case information and are always sent to the same people. For these cases, you can type the necessary addresses into the To field of the email configuration menu.
To add a constant address:
- Click the To button.
- Select the Constant e-Mail account option.
- Type the email address.
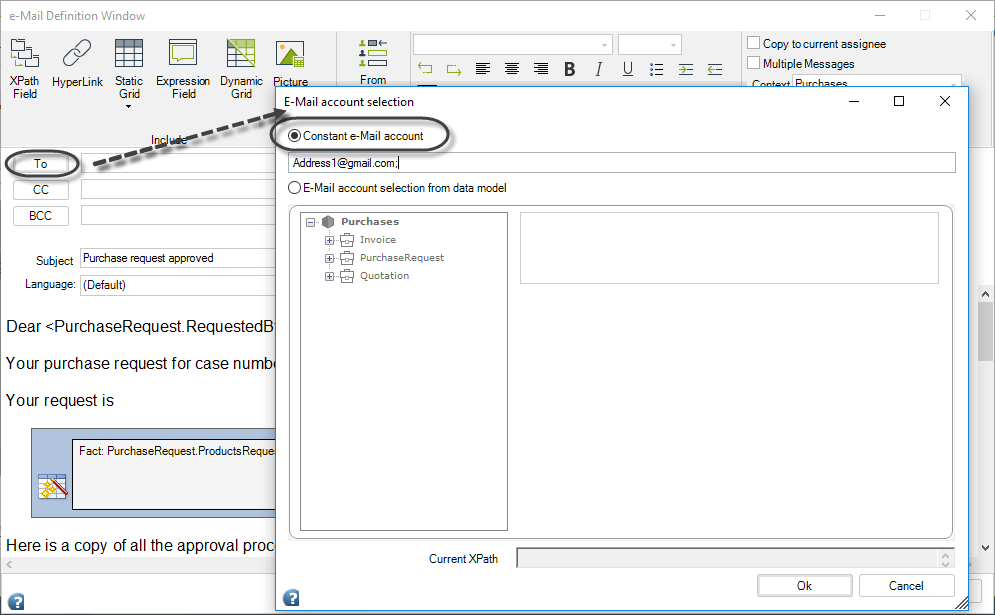
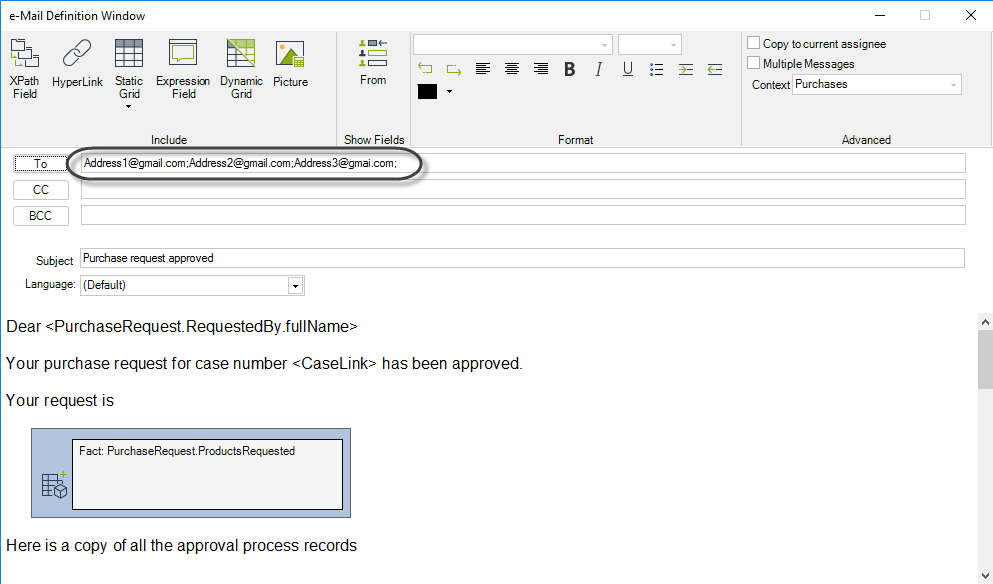
Repeat this procedure for each address you need to include. Note that addresses are separated by semicolons.
Selecting Multiple Recipients from the Data Model
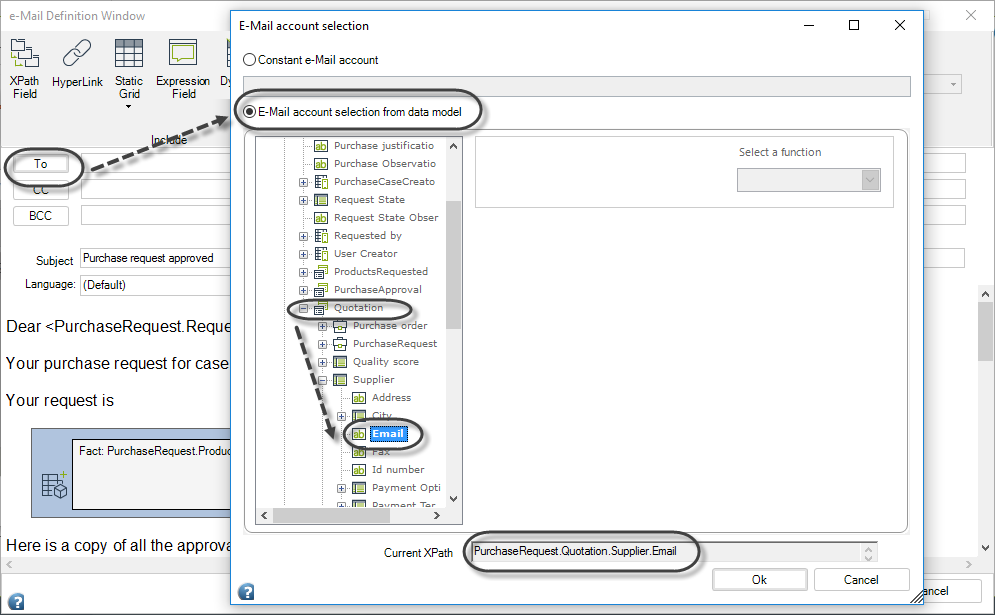
Email addresses stored in attributes of your data model can be included in the To field.
To add an attribute containing an email address:
- Click the To button.
- Select the Send E-mail to an account from data model option.
- Select the attribute on the left of the email accounts selection window.
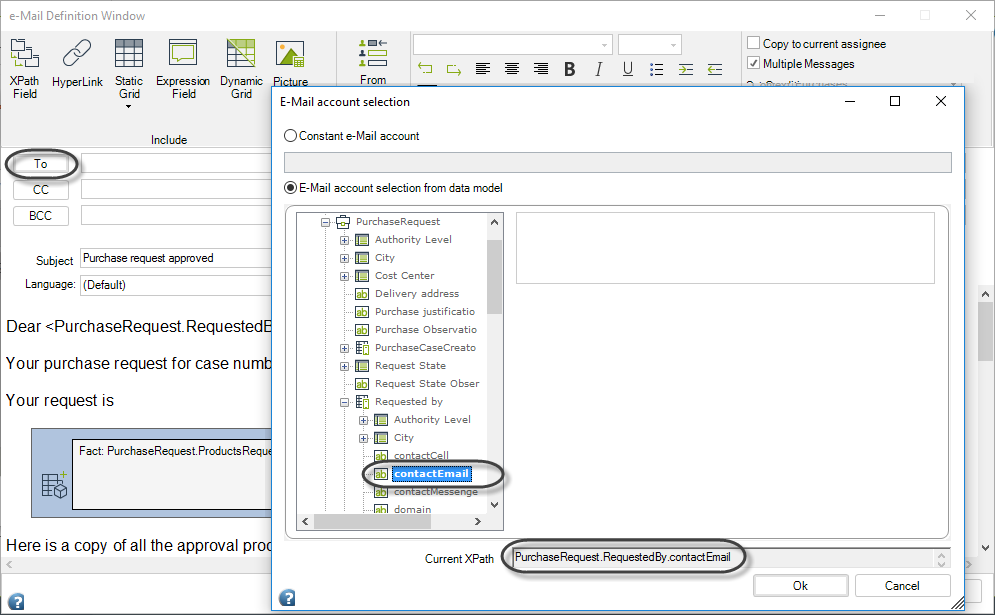
Repeat this procedure for each address. Addresses are separated by semicolons.
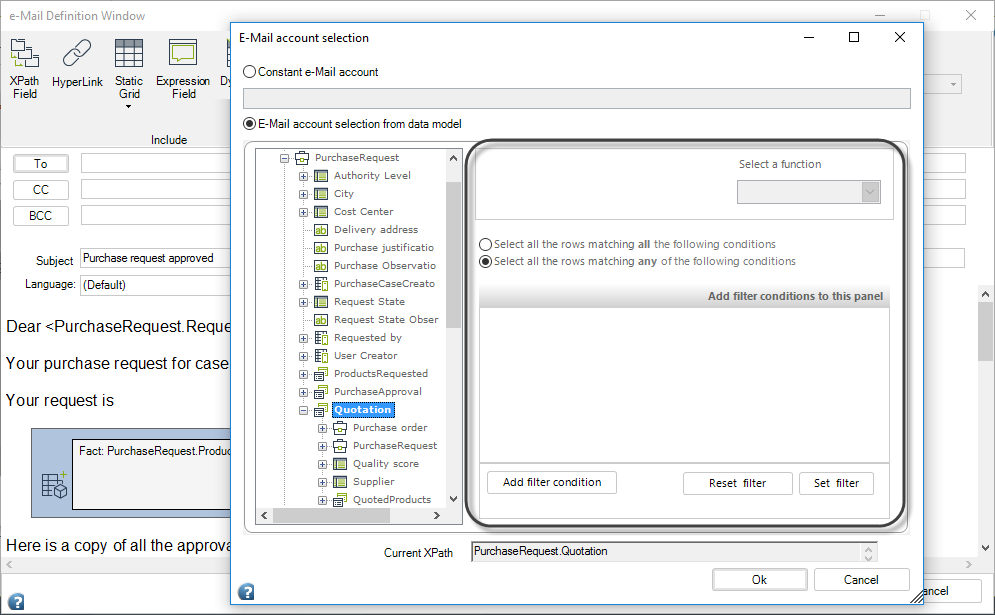
Selecting Multiple Recipients from Collections
When recipient information is stored in a collection (1:n relationship), you can send an email to all of them.
To include an attribute of a collection containing email addresses:
- Click the To button.
- Mark the E-mail account selection from data model option.
- Select the attribute of the collection.
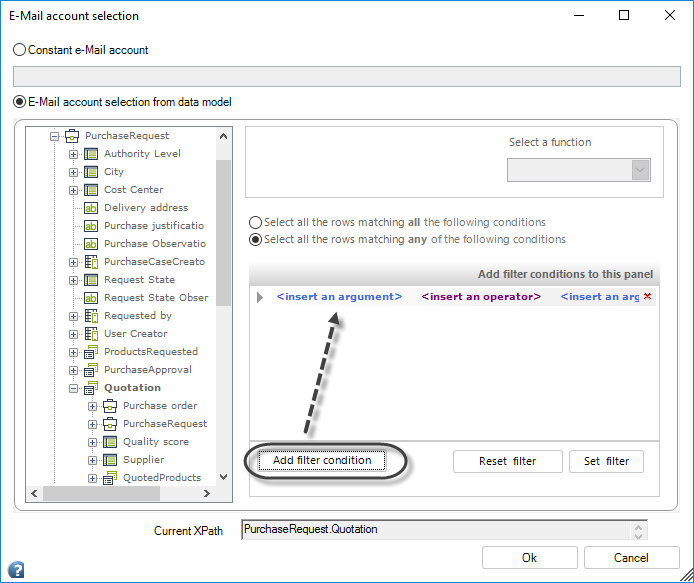
Filtering the Collection
To send emails only to recipients that meet a specific condition:
-
Select the collection in the email accounts selection menu.
-
Click Add Filter condition to add a new filter.
-
Drag and drop the attribute from the collection to the argument placeholder and specify the conditional operator.
-
Click OK. The email will only be sent to recipients within the collection who meet the specified conditions.
Example: Using Multiple Recipients from Collections
Scenario:
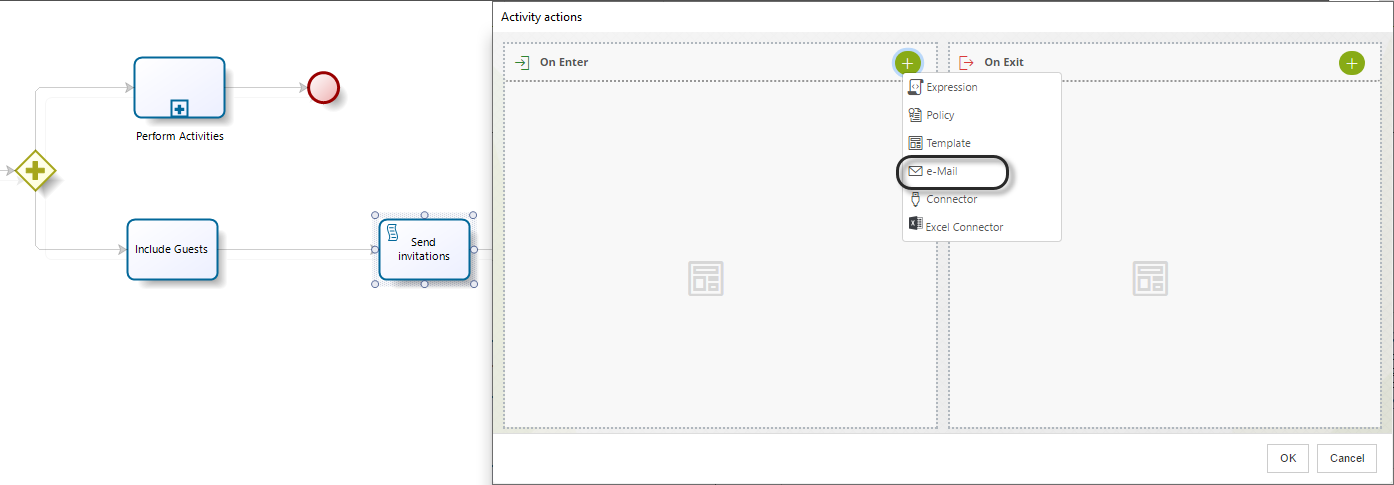
You are a wedding planner managing the necessary activities to coordinate a couple’s wedding. The data model includes a one-to-many relationship between the Wedding (process entity) and the Guests entity, where the couple registers information about attendees.
Sending Invitations
-
Go to the fourth step of the Bizagi Process Wizard and select the Activity Actions option.
-
Select the activity where the emails will be sent and include an email.
-
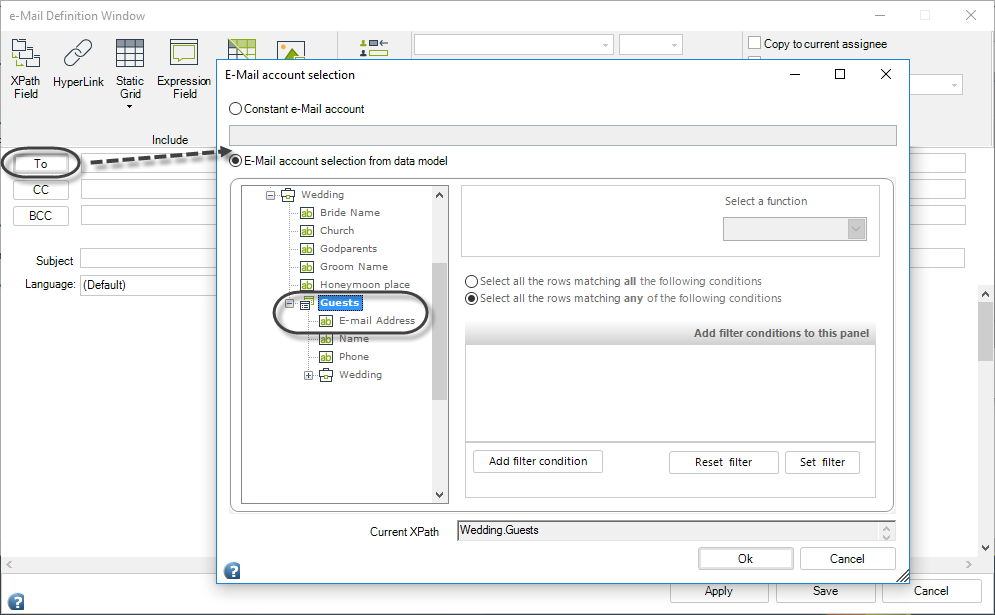
Click the To button and mark the Send E-mail to an account from data model option.
-
Select the attribute of the Guests collection where email addresses are stored.
-
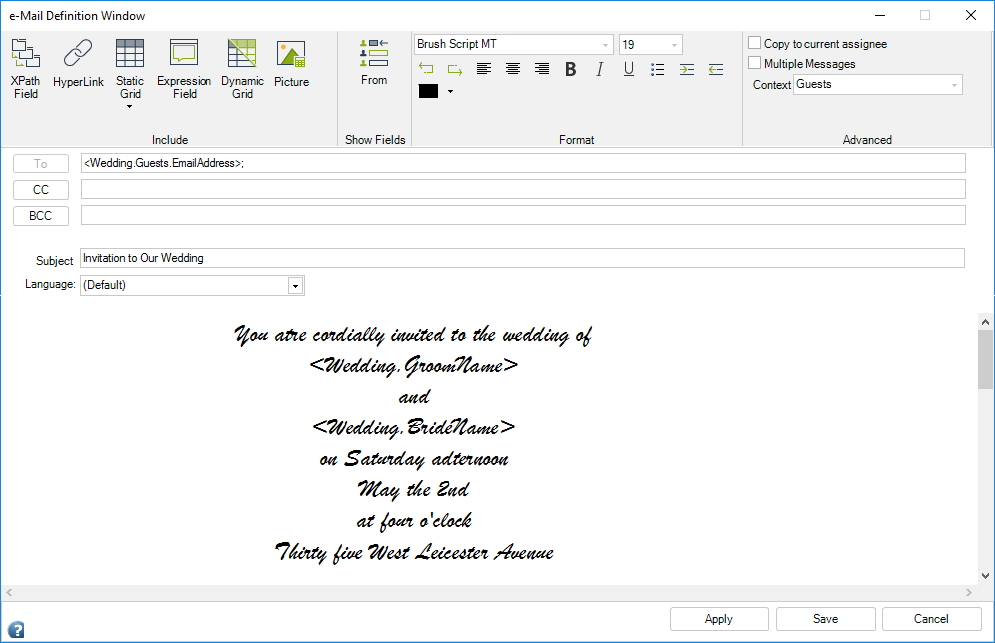
Create the subject and body of the email template.
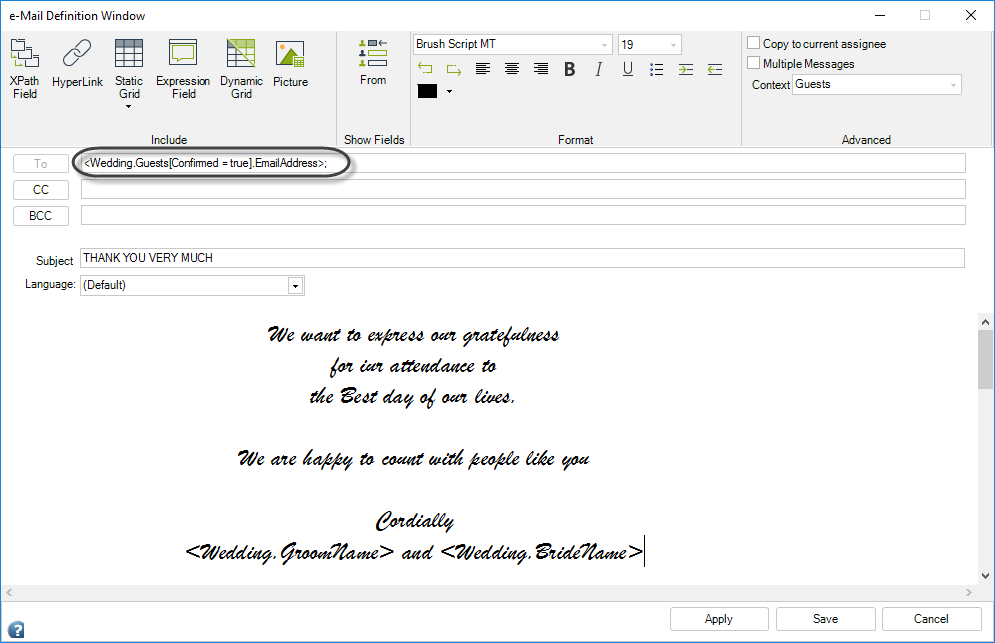
Sending Thank You Emails After the Wedding
If the couple wishes to thank guests who attended, follow these steps:
-
Open the email definition window in the activity where the thank-you email will be sent.
-
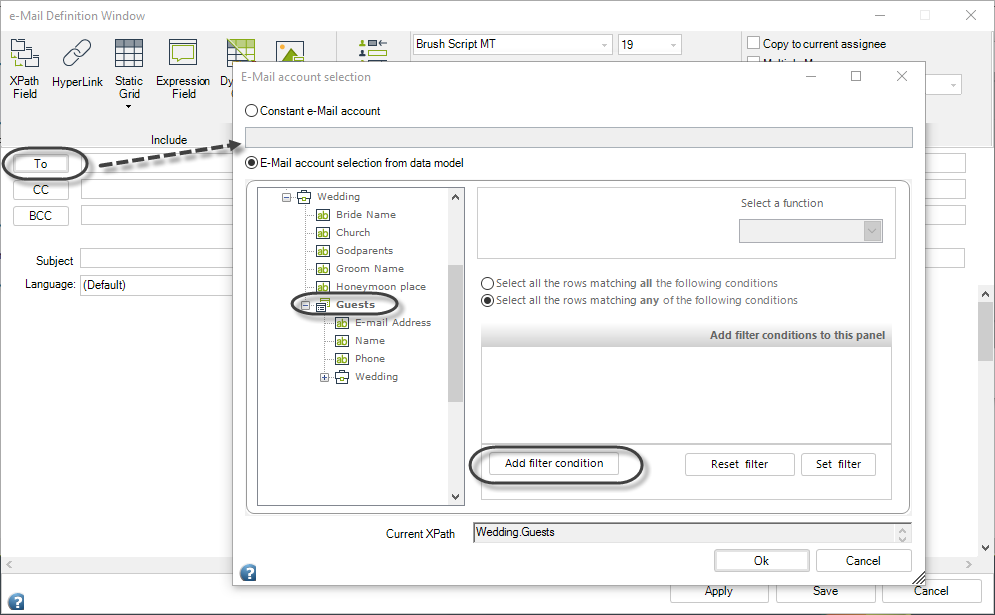
Repeat the previous procedure but include a filter in the email account selection menu.
-
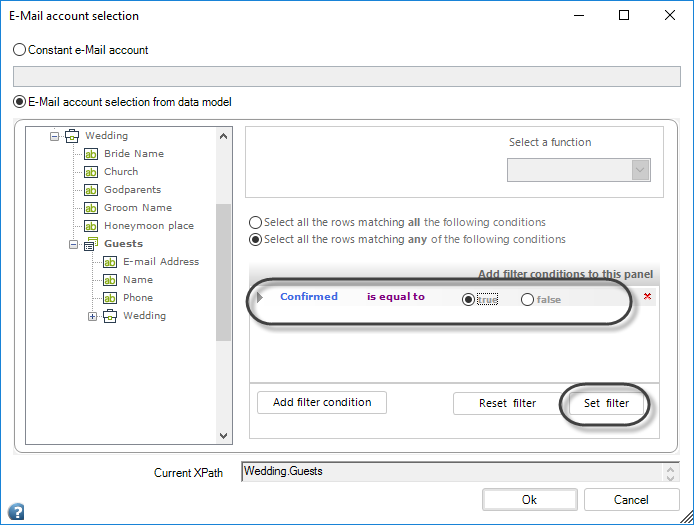
Select the Guest collection and click the Add Filter condition button.
-
Include the filter condition. In this example, send the email to guests who confirmed attendance.
- Select the Confirmed attribute with values of True.
- Click the Set Filter option and select the attribute containing the email addresses.
-
Type a subject and body for the thank-you email template. Note how the filter is displayed in the To field.